
Keep as-is if…
You already have a dripper that works and you're not fighting cracks or leaks. If your pour-over gear is in good shape, you don't need to buy anything new just because it's spring. The biggest variable in cold weather isn't the brewer—it's water temperature.
If you can bring water to a boil and pour it within 30 seconds, you're 80% there. A simple V60 or Kalita Wave will do fine. Don't replace gear that's still functional. Save your money for beans.
One-line takeaway: If it's not broken, keep it.
Small upgrades first
Before you think about a new dripper, consider tweaks that cost less and matter more.
- Gooseneck kettle – This gives you pour control, which directly affects extraction. A cheap one runs $25–$40. You'll notice a difference in evenness.
- Better grinder – A burr grinder beats a blade grinder every time. Even a hand grinder in the $50 range will improve consistency.
- Scale – Weighing your coffee and water removes guesswork. A $15 scale with 0.1g accuracy is enough.
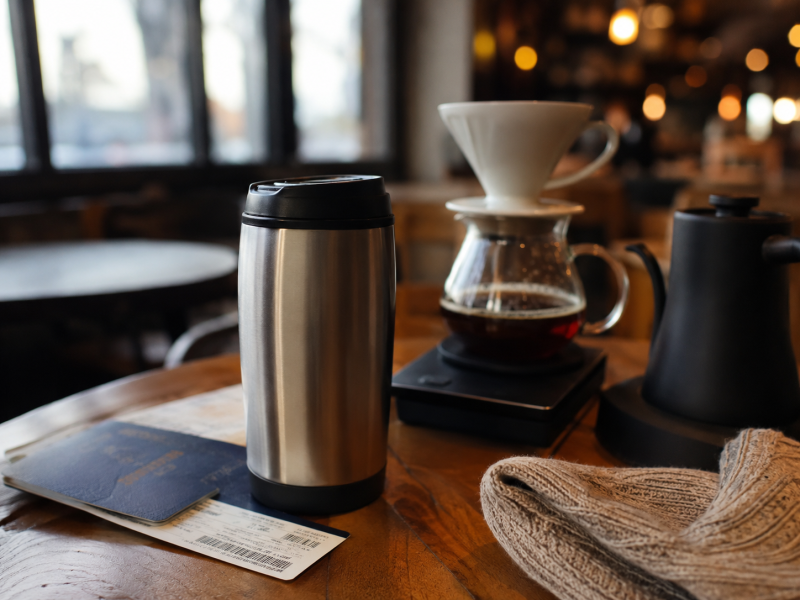
- Insulated server or mug – Keeps coffee warm longer when the wind is biting. A thermos you already own works.
These upgrades cost less than a new brewer and give you more control.
One-line takeaway: Spend on control, not on new plastic.
Full replace triggers
Sometimes you do need new gear. Here's when to pull the trigger:
- Cracked or chipped dripper – Plastic or ceramic cracks can harbor bacteria or affect flow. Replace it.
- Leaking carafe – A server that drips makes a mess and wastes coffee.
- Lid that doesn't seal – If you're using a travel mug, a bad seal means heat loss and spills.
- You can't keep water hot – If your kettle loses heat too fast in wind, consider a camp stove or insulated kettle.
If none of these apply, you're fine. Don't fall for marketing that tells you need a new 'spring edition' dripper.
One-line takeaway: Replace when it's broken or unsafe, not when it's trendy.
Cost math that matters
Let's talk numbers. A new dripper costs $20–$60. A gooseneck kettle is $25–$40. A decent hand grinder is $50. A scale is $15. That's $110 if you buy all four.
But you likely already have a kettle and maybe a scale. So the real cost is often just the grinder or the gooseneck spout.
Compare that to a $100 'event-ready' pour-over kit that includes a dripper, carafe, and scoop—you're paying for stuff you might not need.
Budget rule: Put 70% of your upgrade money into grind and water control, not new hardware.
One-line takeaway: Don't spend $100 on a kit when $40 on a grinder fixes your taste.
Avoid upgrade traps
Here's what to skip:
- Overpriced travel pour-over kits – Often just a dripper in a case. You can do the same with a rubber band and a mug.
- Electric kettles that can't boil – If you're outdoors, you need a stove or a 12V car kettle that actually reaches 205°F.
- Gadgets that promise perfect pours – Flow restrictors and fancy spouts won't fix bad grind.
- Buying gear before testing your current setup – Try a 1:16 ratio and a 30-second bloom first.
Also, don't overcomplicate your brew. In cold wind, your coffee will cool faster, so preheat your mug. That's free.
One-line takeaway: Avoid gadgets that solve problems you don't have.
Quick taste cues
You've brewed. How does it taste?
- Sour, sharp, or thin – Under-extracted. Grind finer or use slightly hotter water.
- Bitter, hollow, or astringent – Over-extracted. Grind coarser or lower the temperature.
- Balanced, sweet, and clean – You're good. Note your ratio and time.
In cold weather, you may need to grind slightly finer to compensate for lower slurry temperature. But don't change everything at once—adjust one variable at a time.
One-line takeaway: Taste is your best guide; use the cues, not the clock.
Final setup checklist
Before you head out, run through this:
- [ ] Dripper and filters—enough for the number of cups
- [ ] Mug or server, preheated
- [ ] Scale and timer (phone works)
- [ ] Water heated to at least 200°F
- [ ] Ground coffee (or beans and grinder)
- [ ] Stir stick or spoon for bloom
That's it. No special 'spring' gear required. Just good coffee, hot water, and a steady hand.
Enjoy your brew. This guide is for adults 21+ only, for general coffee enjoyment.
Sources & Further Reading
- National Coffee Association — Provides standard brewing ratios and temperature guidelines.
Upgrade FAQs
Q: What's the best water temperature for pour-over in cold weather?
Aim for 195–205°F (90–96°C). In cold wind, heat water to 205°F and preheat your brewer and mug with hot water to compensate for heat loss.
Q: How do I adjust my grind when brewing outdoors?
If your coffee tastes sour and under-extracted, grind finer. If bitter and over-extracted, grind coarser. Wind and temperature can alter extraction, so be ready to tweak.
Q: Do I need a special kettle for outdoor pour-over?
Not necessarily. A gooseneck kettle helps control pour, but a regular kettle with a steady hand works. Insulated kettles help keep water hot, but you can also reheat between pours.
Q: What's the ideal coffee-to-water ratio for spring events?
Start with 1:16—1 gram of coffee to 16 grams of water (about 60g coffee per liter). Adjust to taste: stronger (1:14) or milder (1:18).
Upgrade map
- When brewing pour-over coffee outdoors in cold spring weather, focus on water temperature and grind size before buying new gear. A simple ratio of 1:16 (coffee to water) and a 30-second bloom can dramatically improve flavor. Most brewers can be adapted with small tweaks; only replace equipment if it's cracked, leaking, or impossible to keep warm.
- Keep your current dripper if it's intact and you can control water temperature.
- Small upgrades like a gooseneck kettle or a better grinder give the biggest flavor boost.
- Replace gear only if cracked, leaking, or unable to hold heat in wind.
- Budget $30–$60 for meaningful upgrades; avoid overpriced 'event' accessories.